Ready to take your manicure game to the next level? Nail layering is all about adding depth and dimension to your nails in a fun and creative way. With the right techniques and a splash of color, you can transform plain nails into a stunning work of art. Imagine gradients, ombres, and even negative space designs that grab attention! Curious about how to get started? Let’s plunge into the fundamentals you need for your nail layering adventure!
Understanding Nail Layering Techniques
In the domain of nail layering techniques, you’ve got a world of creativity at your fingertips! Nail layering isn’t just about stacking colors; it’s about adding depth and personality to your mani.
You can start with a base coat to protect your nails. Then, layer on your favorite colors. Think gradients or ombres—fun ways to blend shades! You can also mix textures, like matte and glossy finishes.
Don’t forget about nail art! Stamping or adding decals can enhance your look. Remember, patience is key. Allow each layer to dry before adding the next. Incorporating negative space techniques can also create striking designs that highlight the natural nail.
And hey, don’t stress if it gets messy—it’s all part of the adventure! Immerse yourself and investigate what feels right for you. Your nails are your canvas!
Essential Tools and Products for Nail Layering

Having the right tools and products can make all the difference in your nail layering expedition!
Start with a good base coat. It protects your nails and helps colors stick better. Next, grab a variety of polishes—cremes, shimmers, and glitters. Each adds a unique twist to your design. Don’t forget a top coat! It seals everything in and gives that glossy finish.
Begin your nail journey with a solid base coat, diverse polishes, and a glossy top coat for stunning designs!
A thin nail art brush can help with intricate designs, while sponges are perfect for gradient effects. And a dotting tool? Absolutely crucial for those cute little accents. Keep some cotton pads and remover handy for quick fixes.
Additionally, proper nail prep ensures better adhesion and a longer-lasting manicure.
With these tools, you’re set for a fabulous nail layering adventure! So, let’s get started!
Choosing the Right Color Combinations
Color is where the magic happens in nail layering! You’ve got a canvas right at your fingertips, so let’s make it pop.
Start with a base color that speaks to you; it sets the tone for your entire look. Think bold colors like electric blue or soft pastels.
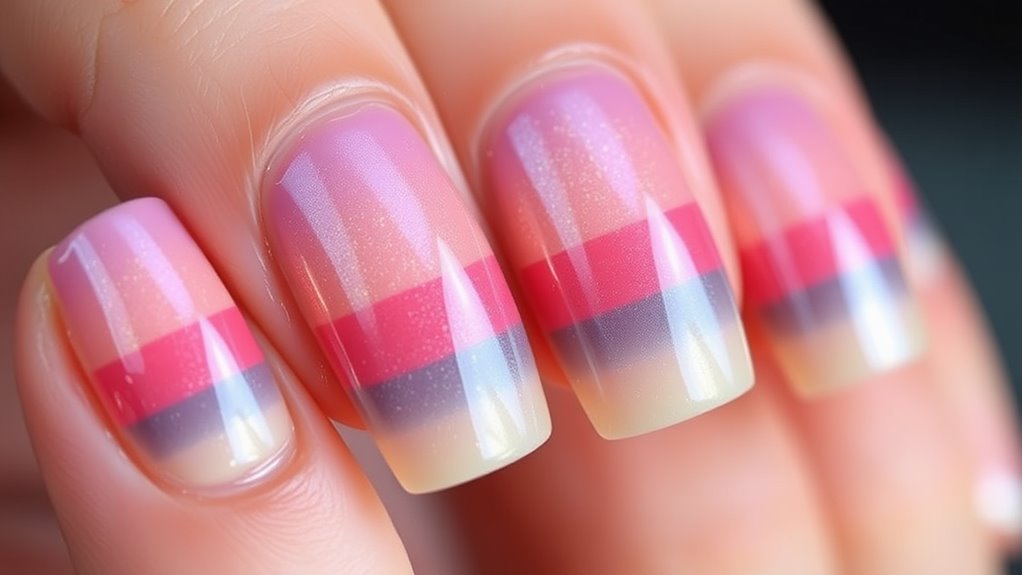
Next, consider complementary shades. They can create stunning contrasts that draw the eye. For instance, pairing a bright coral with a mint green can be super fun!
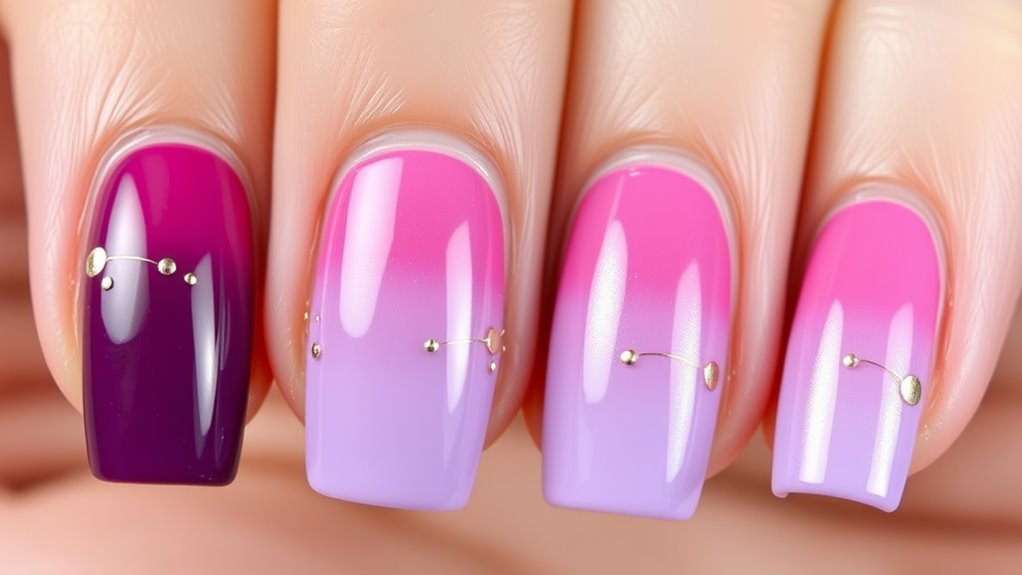
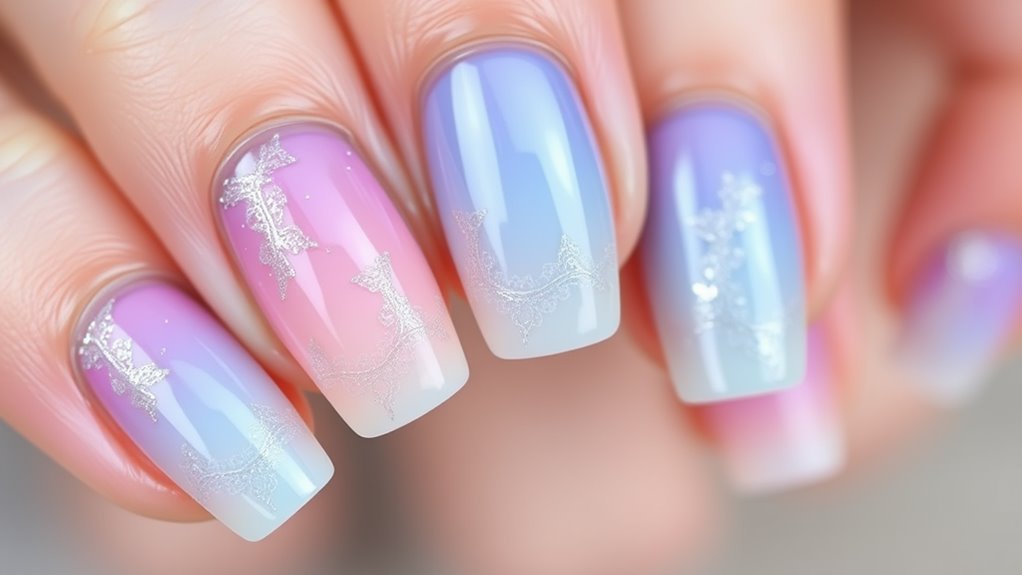
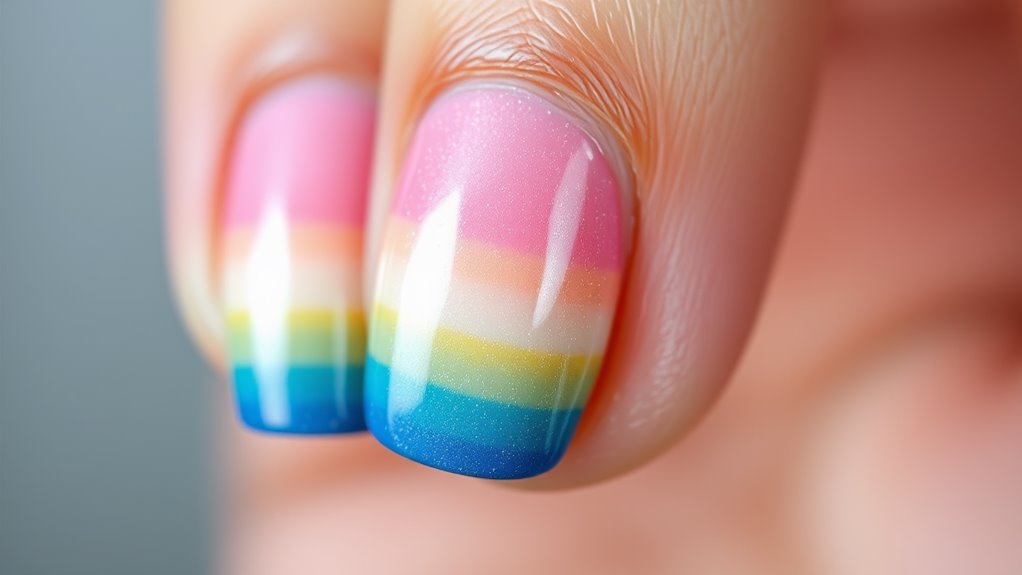
Don’t forget about gradients! Blending two shades can add a dreamy effect.
And if you’re feeling adventurous, try mixing unexpected colors. Just trust your instincts! Additionally, incorporating soft pinks, mint greens, and baby blues can create vibrant spring vibes that enhance your manicure.
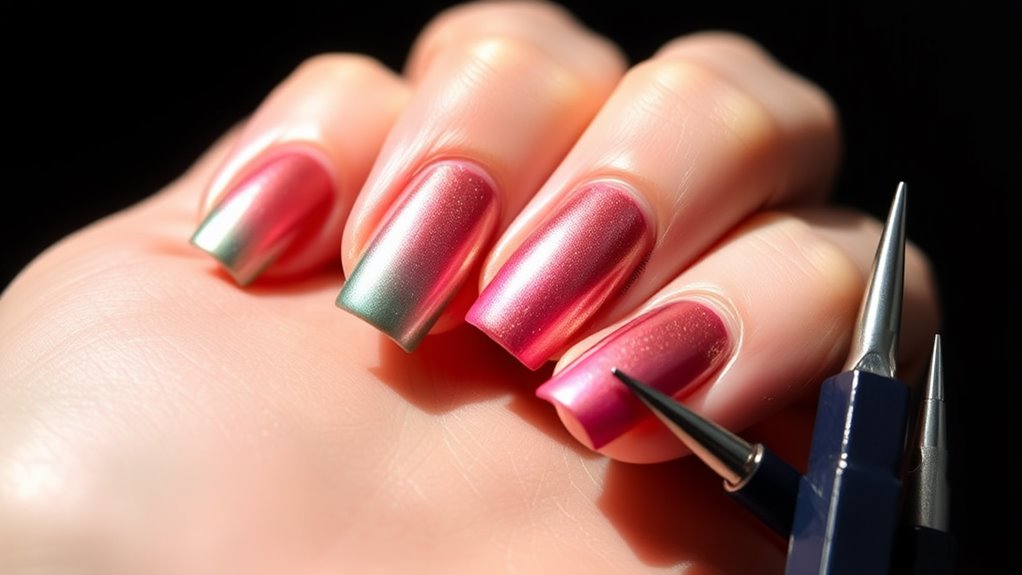
Exploring Different Textures and Finishes
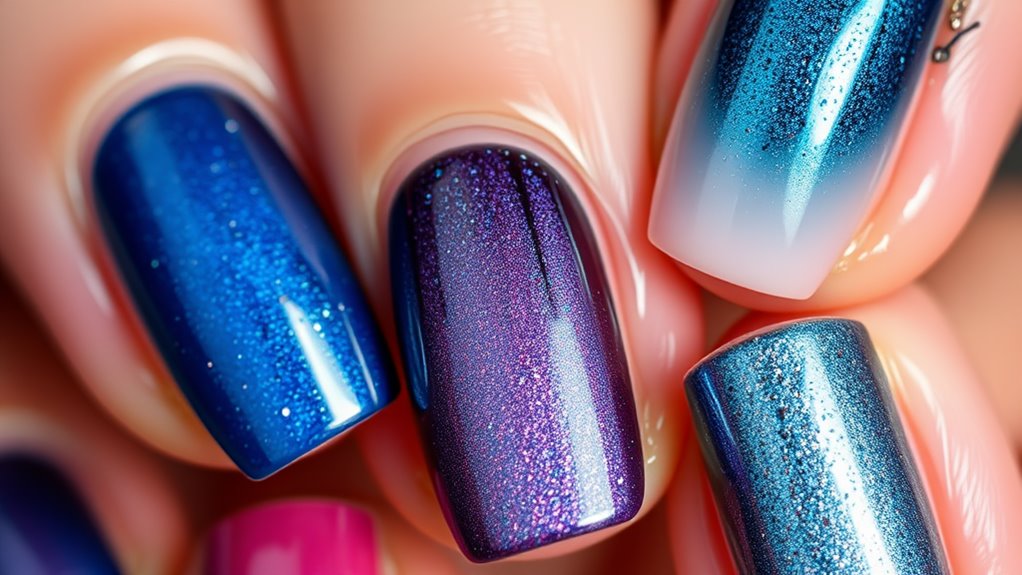
You’ve got your colors sorted, but let’s not forget about textures and finishes! Textures can totally enhance your manicure game. Think smooth, matte, glossy, or even sparkly. Each texture adds a unique vibe.
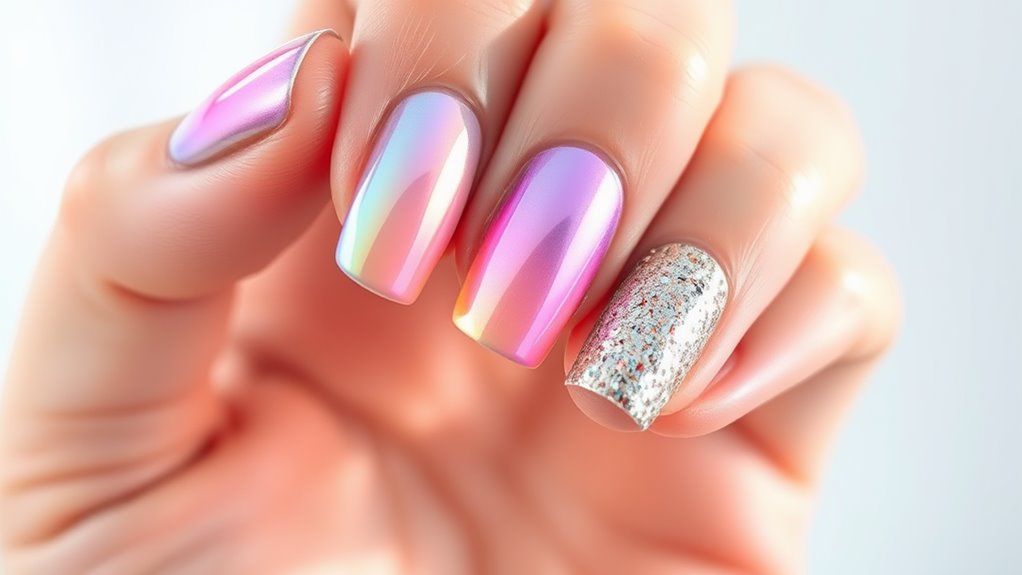
For a chic look, try a matte finish. It’s sleek and modern! Want something fun? Go for a glitter topcoat.
Elevate your style with a sleek matte finish or add some sparkle with a fun glitter topcoat!
Don’t shy away from mixing finishes, either! A glossy base with a matte design can create a stunning contrast. You’ll be amazed at how a little texture can change everything.
Experiment! Layering different textures not only adds depth but also keeps things interesting. Nail art is all about expressing yourself, so play around and find what feels right. Additionally, consider incorporating eco-friendly products into your routine for healthier nails and skin.
Your nails can be a canvas—make it a masterpiece!
Step-by-Step Guide to Nail Layering
Ready to plunge into nail layering? Let’s break it down step by step!
Initially, start with clean, dry nails. Apply a base coat; it’ll help your design stick.
Next, pick your primary polish color and apply a thin layer. Let it dry completely.
Then, choose a second color. For that magical depth, you can use a sheer or glitter polish. Apply it over your base color, but don’t worry about perfection—layering is all about fun!
Once it’s dry, seal everything with a top coat. This’ll add shine and keep your masterpiece intact. Remember to reapply every few days for maximum protection against chips!
Ultimately, admire your work! Remember, practice makes perfect, so don’t hesitate to experiment and show off your unique style!
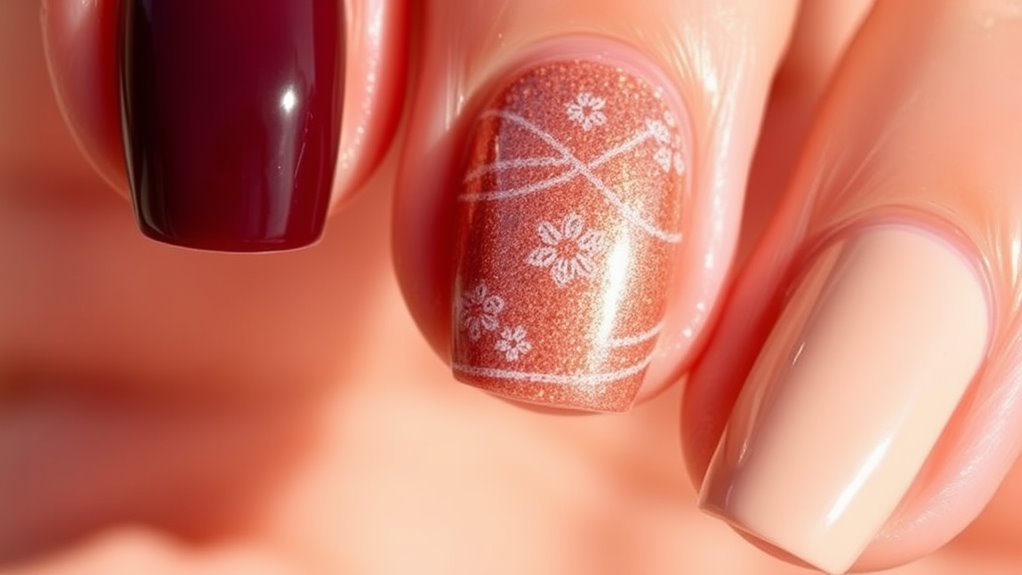
Creative Nail Layering Ideas to Try
Nail layering can be a playground for your creativity! Why not start with a bold base color, then add a sheer glitter on top? It gives a magical sparkle that’s eye-catching.
If you’re feeling adventurous, try a color-blocking technique. Paint different sections of your nails in contrasting colors, and then layer a clear coat for that smooth finish.
You could even use nail stickers or decals between layers for a fun surprise. How about a gradient effect? Paint one color at the tips and fade it into another towards the base.
Experiment with textures too! Matte finishes under glossy top coats create a striking contrast. Additionally, consider incorporating natural dyes from beet juice for unique color options that are eco-friendly.
Your nails can be your canvas, so let your imagination run wild!
Tips for Perfecting Your Layering Technique
Getting the layering technique just right can make all the difference in your nail art game!
To begin, start with a solid base coat. It keeps your nails healthy and helps colors stick. When applying your initial layer, use thin coats. Thick layers can lead to smudging. Wait a minute or two between layers; patience is key!
Experiment with different color combinations, but keep it balanced. If you’re using glitter, make sure it’s evenly distributed for that wow factor. Remember to choose a quality nail polish to ensure a long-lasting manicure.
Don’t forget to seal everything with a top coat. It adds shine and protects your design.
Finally, practice makes perfect! Don’t stress if it doesn’t turn out amazing right away. Every layer is a step toward your nail art mastery! Enjoy the process!
Nail Care Tips for Maintaining Layered Manicures
To keep your layered manicure looking fresh and fabulous, a few simple tips can go a long way!
Initially, always use a top coat. It seals your layers and adds that glossy finish. Reapply it every few days to maintain that shine.
Next, avoid soaking your nails in water for too long; it can cause chips. When washing dishes, wear gloves!
Also, moisturize your cuticles regularly. Dry cuticles can ruin your look.
Ultimately, steer clear of harsh chemicals. They can break down your layers faster than you can say “manicure.” Regularly using moisturizer for hydration can also help maintain the overall health of your nails.
With these tips in your back pocket, your nails will stay vibrant and stunning. You’ve got this—your layered look will turn heads for sure!
Drawing Inspiration From Nail Art Trends
If you’re looking to spice up your layered manicure, why not draw inspiration from the latest nail art trends? There’s so much creativity out there!
Think about incorporating popular designs like geometric shapes or negative space. These styles can really make your layers pop.
You could also investigate ombre effects, blending colors for a stunning gradient.
Or, why not try out some fun textures? Matte finishes paired with glossy top coats can create cool contrasts.
Don’t forget about seasonal themes! Whether it’s florals for spring or cozy colors for fall, let your mood guide you. Consider adding tropical-inspired designs to capture the essence of summer celebrations.
The key is to have fun and express yourself. So grab those polishes and get creative! Your nails are the perfect canvas.
Conclusion
Nail layering is like painting a sunset. You start with a solid base, then blend colors to create those stunning gradients. Each layer adds depth, just like the layers of a beautiful sky. Remember, patience is your best friend here! Let each coat dry fully, and soon you’ll have a manicure that stands out. So grab your tools, release your creativity, and let your nails tell your story. You’ve got this! Enjoy the process!